Published September 13, 2023 in Roblox Development Tutorials
Banking Plus Installation Guide
Written By:

Seal
Seal is a jaded programmer who has been scripting long past retirement age.
Video Tutorial:
Banking Plus Installation Guide
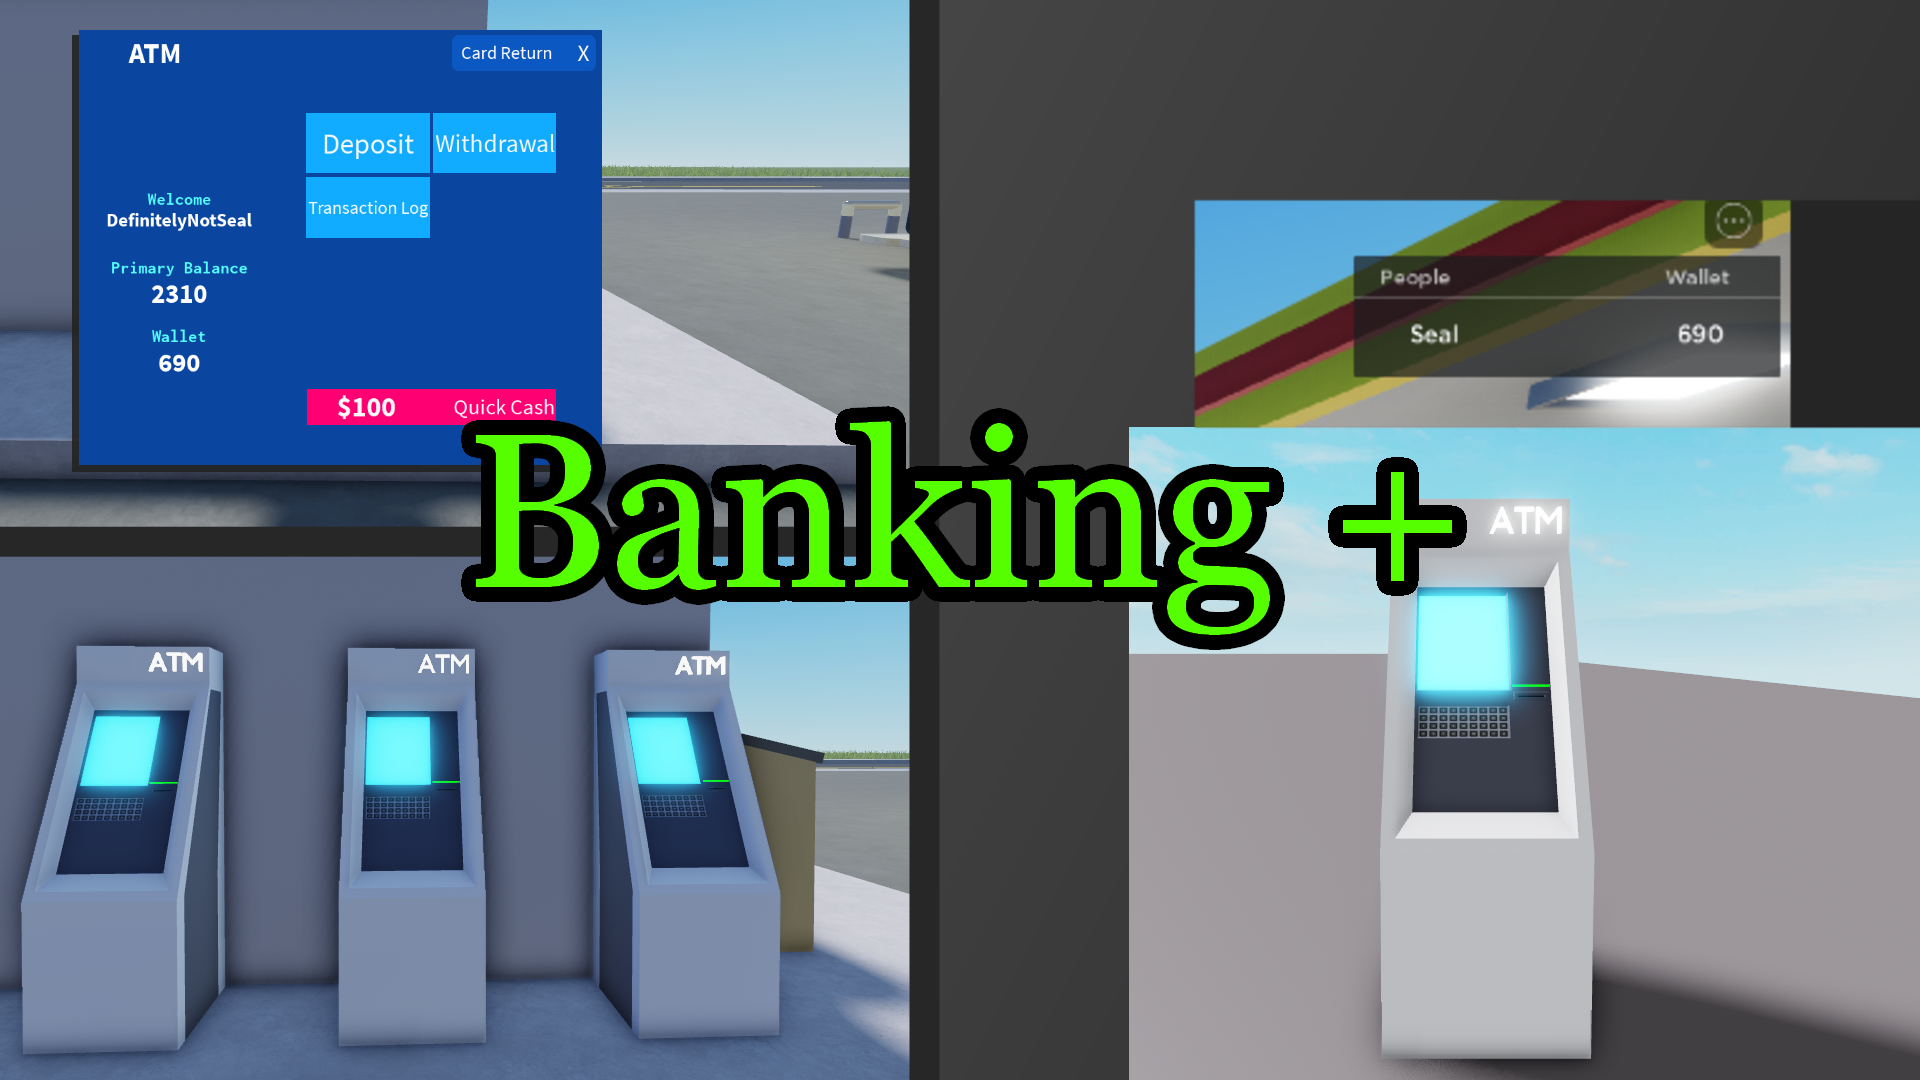
This guide requires that you already have purchased Banking Plus. If you have not and are considering buying Banking Plus, check out the sales page here.
Setting Up The File System
Setting up the file system requires inserting Banking Plus into your Roblox place. To do that, right click "ServerScriptService" and select “Insert From File”. Select the Banking Plus file.
It will load three files:
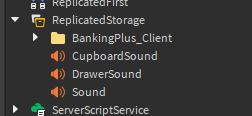
Once you have inserted the files into your game, you're going to need to place them in the appropriate files. Here is a chart to display where each folder goes:
ATMs --> Workspace

BankingPlus --> ServerScriptService

BankingPlus_Client --> ReplicatedStorage
Adjusting The Settings
There are a couple of customization settings for Banking Plus. This subheading will cover each setting and how to customize it.
Here is a comprehensive list of the settings for banking plus:
Single Value Settings
save_tries. Save tries is a number value. It sets the maximum amount of times the datastore will try retry failed data saving. If the server sends a save data request and it fails, it will retry until it's try count is the same as save tries. Usually 3 is a balance number. If you have any special saving requirements in your game feel free to adjust this amount at. Do so at your own risk!
only_whole_numbers. This setting adds or removes logic based on it's value. This is a boolean value, it setting will either be true or false. If this setting is true, it will ensure all player values will only be whole numbers. For instance, with this setting active, player's can't have a balance of $150.35, it will be set to $150. If this setting is false, players will be able to have non whole number balances. If this setting is active, an extra function is called when player receive funds into their account and wallet. This extra function rounds the amount up or down based on position to ensure it is a whole number.
starting_wallet. The starting wallet value is a number value. It sets the players starting wallet. It's default is 100, meaning players will start the game with $100 in their wallet.
starting_balance. Starting balance works the same as starting wallet. It sets the players starting balance in their bank account. The default for this setting is 500, meaning players will start the game with $500 in their bank account.
create_leaderstats. This setting is a boolean value that determines if banking plus should create a leaderstats folder. This is set to true by default. If you have your own script that creates a leaderstats folder, then set this to false.
dont_display. This setting determines if any values should be created an updated for leaderstats. This is a boolean value, and if it's set to false, it will not create display values for each player currency value such as wallet, balance, and total balance. If you don't want a leaderboard, or would like to handle the leaderboard creation and updating yourself, then set this value to true. It's default setting is false.
Table Settings
The next two settings are table settings. These table settings control different aspects of how banking plus functions. The leaderstats display sets the name and display values for each player currency value. The legit income sources table is for security purposes.
Leaderstats Display
Each key equals an array with two values:
key = {boolean, string};The boolean value determines whether banking plus will create and update a physical value for it. The string determines what the value will be called on the leaderboard. For instance. Let's say you only want to display the players total balance. You would set wallet, and balance, to false. Then you would set total balance to true. Then, if you wanted to call the players total balance "Net Worth", you would set the second string value to: "Net Worth" like in the example below.
total_balance = {true, "Net Worth"}WARNING! Changing they key name of any value WILL break the system! The key name is used for indexing and is never displayed to the player.
Legit Income Sources
Legit income sources is a large array with all of the allowed "income sources" that banking plus will accept. This is used for two purposes, first: It's for security reasons. Let's say you have a pizza place that your players can work at in order to make some money. When you give players a paycheck and call the transfer funds function, you will need to provide an origin to those funds. Being that our pizza place is the one paying our players, we can provide the origin "Bloxy Pizza co.". Being that "Bloxy Pizza co." is a legit income source, we will want to add that into our array of legal transfer sources.
legit_income_sources = {"wallet", "balance", "Bloxy Pizza co."}Note:
How we type our origin source in this array, is what it's going to look like to the player on the transaction log!
The two exceptions are wallet, and balance, Banking Plus knows to automatically format them to a proper text look. Now, our second reason for having an array like this, goes with our note. When players look into their transaction log after getting a paycheck from Bloxy Pizza, they will see a message like:
9/13/2023
+ $350 from Bloxy Pizza co.
This also allows you to track players income. All transaction data is stored in each players data store. It includes the origin, destination, amount, and date. If a player in your community is suspected of cheating in-game funds, you can easily look into their transaction history and confirm it.
This gives you as a developer extra anti-cheat powers! Let's say an exploiters finds a way to abuse a remote event to funnel funds through Bloxy Pizza. We know that players can only receive a maximum paycheck $350 in one transfer from Bloxy Pizza. If we look into their transaction data and see that they received $1,000 from Bloxy Pizza, we know they cheated. There are plans in the future to add a maximum transfer amount for in-game businesses to auto kick players if they receive a bigger transfer than what that business allows.
Creating ATMs
The ATMs are the best part of Banking Plus. The professional UI and ATM models make for easy customization, and a great look for your roleplay game. Let's cover some basics on how to use the ATM class provided with Banking Plus.
Complimentary ATM Model
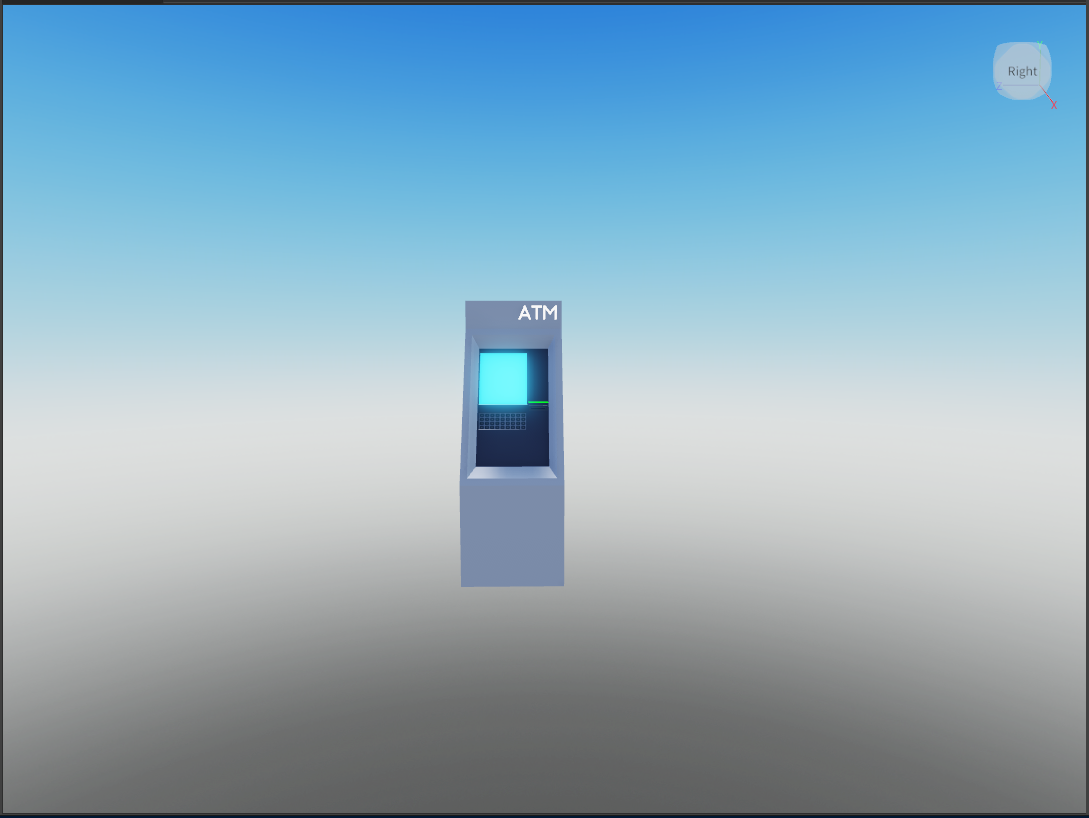
Banking Plus comes with a FREE ATM model! This model was made using Blender. The choice to use the model is up to you. The cool part about the model is this mesh is not the interface for using the ATM UI. It's just for decoration. Meaning it's super easy to use your own ATM model, or you could easily make a bank NPC by changing the proximity prompt text!
Here's where you can find the ATM model in Banking Plus:
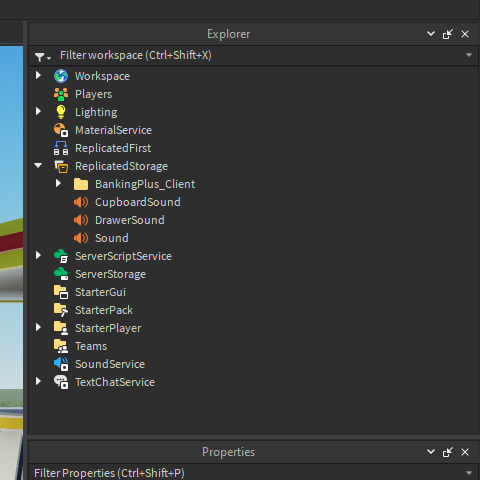
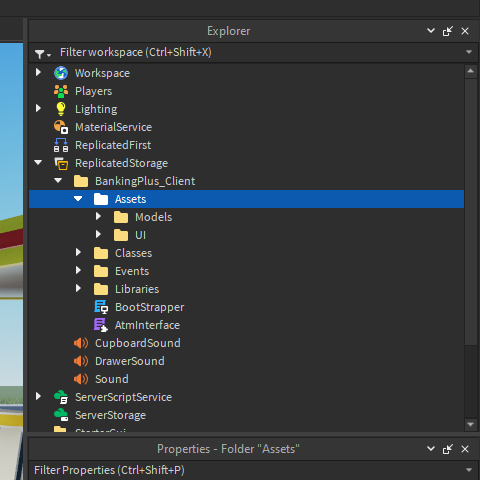
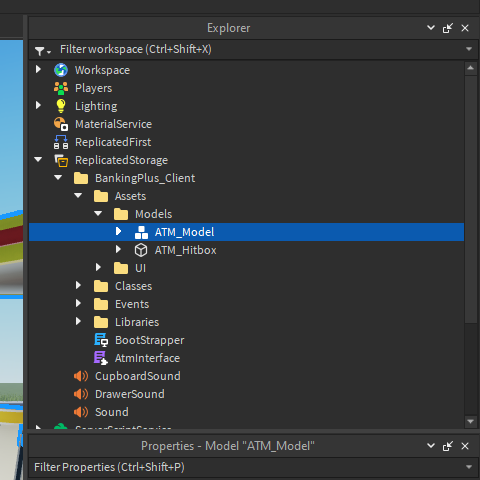
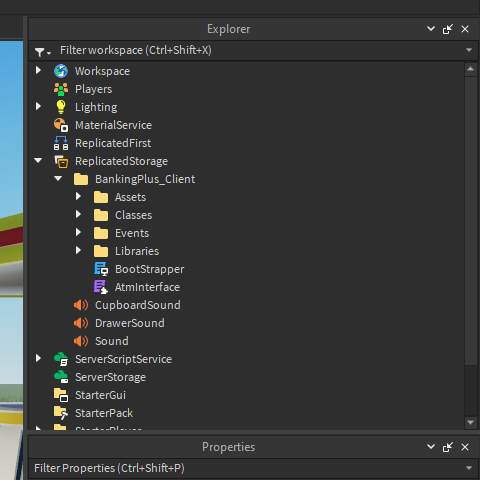
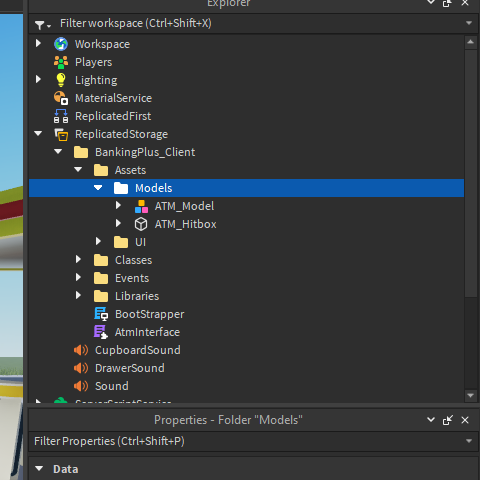
Go to: ReplicatedStorage --> BankingPlus_Client --> Assets --> Models --> ATM_Model
Here is the play-by-play through images:
ATM Class
The ATM class is a part with a proximity prompt. This part will need to be placed into the ATMs file that we moved into the workspace earlier. To find this class part, look at the pictures above, where the ATM_Model is. Instead of selecting ATM_Model, copy and paste the ATM_Hitbox part.
This part acts as an ATM. It's invisible, so if you have bank NPCs or your own ATM model, simply line the invisible part where your object is, then customize the proximity prompt text. Make sure that all of the hitboxes are inside of that ATMs folder in the workspace! If not, it won't act as an ATM.
Customizing the ATM UI
You won't be able to move around, or change any of the frame names in the UI. Making changes of that degree will break the UI class. You can however, change any aesthetics of any frame or button!
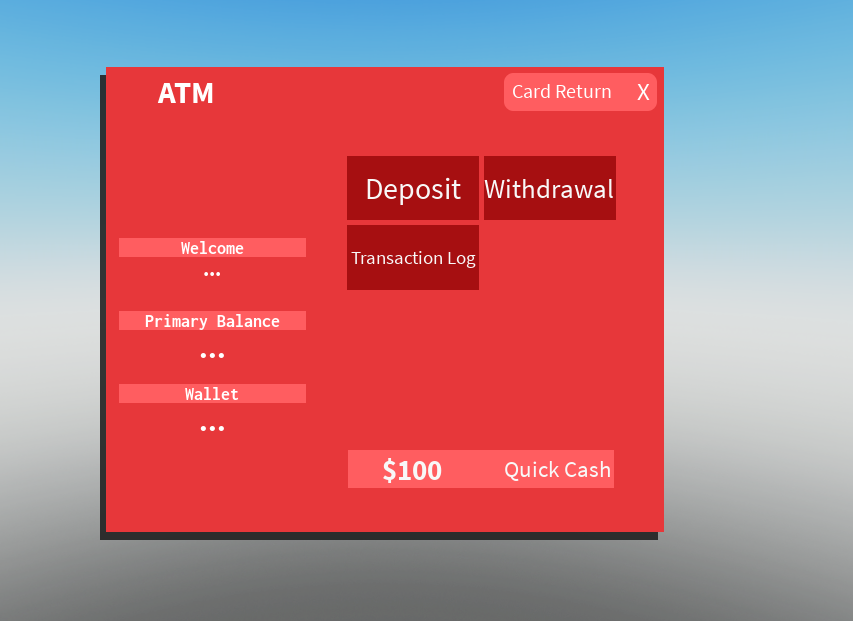
Here is an example of what an alternate UI color scheme could look like:
Any frame or text colors can be freely changed, along with any fonts. Do however be mindful that certain buttons and frames require Rich Text to be set to true.
If you intend to make any changes to the UI, I recommend making a copy and placing it into ServerStorage, that way you will always have the original, and a backup incase you make any accidental changes while working on it.
You can find the UI inside BankingPlus_Client --> Assets --> UI
Interacting With Banking Plus
This portion is going to cover the Banking Plus API and how you can integrate it into your game. You can access the Banking Plus API by calling:
local currencyService = require(game:GetService("ServerScriptService").BankingPlus.CurrencyService)Currency service is the API interface. It holds all of the functions you will need to interact with Banking Plus. There are two public functions you can call that will allow you to interact with Banking Plus.
Reading Data
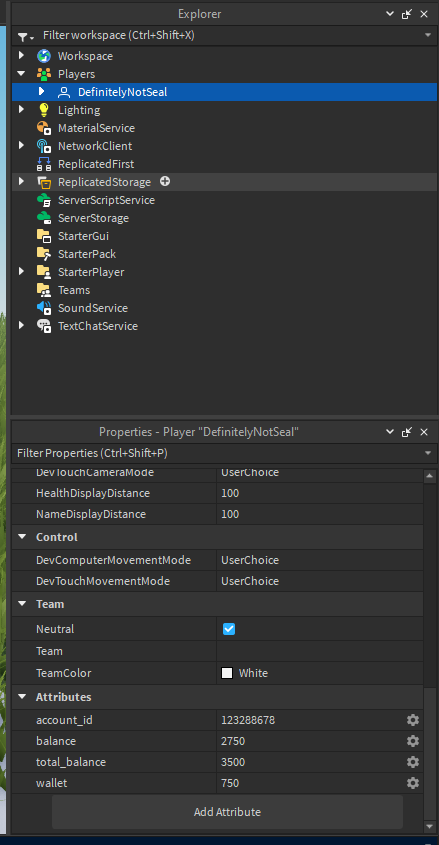
If your interested in simply reading a players stats, Banking Plus creates attributes for each player stat, and attaches them a players Player object.
Here is an example of what the attributes look like:
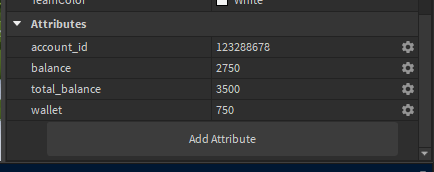
If you're making a currency display UI, it's recommended that you read the values from here, not leaderstats.
The values are broken up as follows:
- Wallet is the player pocket money.
- Balance is the players bank account.
- Total balance is a both combined.
- Account ID is their bank account identification number.
Getting a Players Bank Account
The attributes only display simple numbering values. Things like a player's transaction log is not shown there. In order to access a player's bank account you will need to call a function inside currency service.
In order to get a player's bank account, you will need to call:
local account = currencyService.getAccount(player) --you can either pass player, or player.UserId
This will return a custom type [bankAccount] The bankAccount type is a dictionary mapped like this:
account: bankAccount = {
	balance: number;
	wallet: number;
	total_balance: number;
	account_id: number;
	account_log: array;
}
The account log is an array that is filled with transaction records. Each transaction record is also a custom type. They are formatted as follows:
type transactionRecord = {
	amount: number;
	origin: string;
	ending_point: string;
	date: number;
}
Here are the fields:
- amount. The amount field is number that represents the of money moved in said transaction.
- origin. The origin field is a string that notes the origin of the currency. All funds throughout the game to be tracked.
- ending_point. The ending point field notes where the funds ended up at. The field is also a string. If the player received funds, then the ending point will either be "wallet" or "balance". If they sent funds, say for purchasing an item, the ending point will be the legal transaction point for the in-game business, such as: "Dan's Home Furniture"
- date. The date field is a number. The reason for this is the date field is set by calling tick(), meaning the date field is the saved down to the second the transaction took place. (Time Zone Differs Will Occur!) You can format this into a proper date month/day/year by using the OS library.
You can format the tick date value by running your code as follows:
local timeTable = os.date("*t", transactionRecord.date)
local formattedDate = ("%s/%s/%s"):format(timeTable.month, timeTable.day, timeTable.year)
Transferring Funds
Transferring funds is done through a public function in CurrencyService. The function is called "processTransferRequest". There are a lot of moving parts to this function, so lets break it down to see each part, and how to move funds around for our players.
The simple call for the function looks like this:
local success, message = currencyService.processTransferRequest(player.UserId, transferData)Process transfer request uses a custom type, it also returns two values. Let's start with the returning values. This function returns a boolean value, and a string value. Being that this function has to run multiple security checks It's been structured to resemble a pcall.
The boolean, success, will be true if the transfer did not encounter any issues. It will be false if the transfer failed. The string, message, will be a formatted message explaining to the player why the transfer passed, or failed. This string message can be directly loaded into a text labels .Text property. If the transfer was successful, it will return the message "Transaction finished!". If the transaction failed, it will reveal the reason: "Insufficient funds!" or "Illegal transfer: no origin!".
If a transaction fails, it will return a display message, but it will also warn a debug message going into more detail as to why the transaction failed. For instance, if the transaction fails because the amount value is not a number it will send the following:
warn("type mismatch: amount ~= number!")
return false, "Transfer failed!"
Now, onto the custom type transferData. The transferData type is a dictionary structured as follows:
type transferData = {
	amount: number;
	destination: string;
	origin: string;
}
The arguments are pretty self explanatory.
- Amount is the amount of funds being moved.
- Destination is where they will end up. If you are transferring funds to the player the destination will need to be "wallet" or "account".
- Origin is the origin of the funds. If you want to take money from the player, set the origin to "wallet" or "account".
Note: If you are removing funds from the player, keep the amount field a positive number. If you pass a negative number it will have unintended effects!
Conclusion
That's it for the Banking Plus installation and API documentation guide! If you have any questions, or if you feel that this article did not cover certain aspects of Banking Plus, please send us a message through our contact form on this website. You can find that form by selecting "Contact Us" on the main site menu.
Thanks for reading.
Recent Posts
No posts found...